2018年02月
・リモート:VPS ( Cloud At Cost )
CentOS7-64bit
2CPU , メモリ 1GB , 20GB SSD
・ローカル:ノート PC
Fedora-64bit
インストール参考:WAVE Log : Linux Desktop
・VNC接続をするユーザ:sshuser
SSHポートフォワーディングを利用して接続するので、SSH接続しているユーザと同じにしています。
・ディスプレイ番号:1
・ポート:5901(5900+ディスプレイ番号)/TCP
SSHポートフォワーディングを利用して接続するので、5901のポートを開放する必要はありません。
[root@remote ~]# yum install tigervnc-server
オリジナルの設定ファイル「vncserver@.service」をコピーして「vncserver@:1.service」の設定ファイルを作成する。
[root@remote ~]# cp /lib/systemd/system/vncserver@.service /etc/systemd/system/vncserver@:1.service
設定ファイルを編集する。<USER> を実際のユーザ名(sshuser)に置き換える。
[root@remote ~]# vi /etc/systemd/system/vncserver@:1.service
# The vncserver service unit file
#
# Quick HowTo:
# 1. Copy this file to /etc/systemd/system/vncserver@.service
# 2. Replace <USER> with the actual user name and edit vncserver
# parameters appropriately
# ("User=<USER>" and "/home/<USER>/.vnc/%H%i.pid")
# 3. Run `systemctl daemon-reload`
# 4. Run `systemctl enable vncserver@:.service`
#
# DO NOT RUN THIS SERVICE if your local area network is
# untrusted! For a secure way of using VNC, you should
# limit connections to the local host and then tunnel from
# the machine you want to view VNC on (host A) to the machine
# whose VNC output you want to view (host B)
#
# [user@hostA ~]$ ssh -v -C -L 590N:localhost:590M hostB
#
# this will open a connection on port 590N of your hostA to hostB's port 590M
# (in fact, it ssh-connects to hostB and then connects to localhost (on hostB).
# See the ssh man page for details on port forwarding)
#
# You can then point a VNC client on hostA at vncdisplay N of localhost and with
# the help of ssh, you end up seeing what hostB makes available on port 590M
#
# Use "-nolisten tcp" to prevent X connections to your VNC server via TCP.
#
# Use "-localhost" to prevent remote VNC clients connecting except when
# doing so through a secure tunnel. See the "-via" option in the
# `man vncviewer' manual page.
[Unit]
Description=Remote desktop service (VNC)
After=syslog.target network.target
[Service]
Type=forking
User=<USER>→sshuser
# Clean any existing files in /tmp/.X11-unix environment
ExecStartPre=-/usr/bin/vncserver -kill %i
ExecStart=/usr/bin/vncserver %i
PIDFile=/home/<USER>→sshuser/.vnc/%H%i.pid
ExecStop=-/usr/bin/vncserver -kill %i
[Install]
WantedBy=multi-user.target
設定変更を反映。
[root@remote ~]# systemctl daemon-reload
メモリ 1GB だと GNOME が動きません。てか、SSH 接続しての操作も危うくなります(なりましたw)。
なので、Xfce をインストールします。EPEL リポジトリが必要です。
[root@remote ~]# yum groupinstall "X Window System"
[root@remote ~]# yum --enablerepo=epel groupinstall xfce
ちなみに、GNOME なら。
[root@remote ~]# yum groupinstall "GNOME Desktop"
日本語フォントをインストールする。
[root@remote ~]# yum -y install vlgothic-*
ibus-kkc をインストールする。
[root@remote ~]# yum groupinstall "Input Methods"
☆Firefox をインストールする。
[root@remote ~]# yum install firefox
☆最新版の Firefox が良ければ、最新版の Firefox をダウンロード。
[root@remote ~]# wget -L -O firefox.tar.bz2 'https://download.mozilla.org/?product=firefox-latest-ssl&os=linux64&lang=ja'
展開して、移動。
[root@remote ~]# tar xfj firefox.tar.bz2
[root@remote ~]# mv firefox /usr/local/
ダウンロードした実行ファイルを /usr/bin/firefox にシンボリックリンクする。
[root@remote ~]# ln -s /usr/local/firefox/firefox /usr/bin/firefox
バージョン確認。
[root@remote ~]# firefox -v
Mozilla Firefox 58.0.2
☆Chrome が良ければ、google-chrome.repo を作成。
[root@remote ~]# vi /etc/yum.repos.d/google-chrome.repo
[google-chrome]
name=google-chrome
baseurl=http://dl.google.com/linux/chrome/rpm/stable/$basearch
enabled=1
gpgcheck=1
gpgkey=https://dl-ssl.google.com/linux/linux_signing_key.pub
インストール。
[root@remote ~]# yum install google-chrome-stable
あと、テキストエディタはあった方が良いかな。
[root@remote ~]# yum install gedit
んで、再起動。
[root@remote ~]# reboot
VNC接続を設定したいユーザ(sshuser)でログインし、VNCパスワードを設定した後にVNCサーバを起動します。
(一度起動しないと各種設定ファイルが作成されません)
[sshuser@remote ~]$ vncpasswd
Password:
Verify:
Would you like to enter a view-only password (y/n)? n
ディスプレイ番号「1」で起動。
[sshuser@remote ~]$ vncserver :1
ディスプレイ番号「1」を指定して停止。
[sshuser@remote ~]$ vncserver -kill :1
※ホスト名の名前解決ができない場合は、VNC起動時に以下が出力されます。
hosts にホスト名を登録すれば出なくなります。
xauth: (stdin):1: bad display name "remote.localdomain:1" in "add" command
[root@remote ~]# vi /etc/hosts
xxx.xxx.xxx.xxx remote.localdomain
[root@remote ~]# systemctl restart network
[sshuser@remote ~]$ vi ~/.vnc/xstartup
#!/bin/sh
#unset SESSION_MANAGER
#unset DBUS_SESSION_BUS_ADDRESS
#exec /etc/X11/xinit/xinitrc
export GTK_IM_MODULE=ibus
export XMODIFIERS=@im=ibus
export QT_IM_MODULE=ibus
ibus-daemon -drx
exec xfce4-session &
ちなみに、GNOME なら「exec xfce4-session &」を「exec gnome-session &」に。
オプションを ~/.vnc/config ファイルで設定できます。
一応、「VNCクライアントが安全なトンネル経由で接続するとき以外は接続できなくなる」という「localhost」だけ設定しています。
ちなみに、geometry のデフォルトは、1024x768 です。/usr/bin/vncserver ファイルで設定されています。
[sshuser@remote ~]$ vi ~/.vnc/config
## Supported server options to pass to vncserver upon invocation can be listed
## in this file. See the following manpages for more: vncserver(1) Xvnc(1).
## Several common ones are shown below. Uncomment and modify to your liking.
##
# securitytypes=vncauth,tlsvnc
# desktop=sandbox
# geometry=2000x1200
localhost
# alwaysshared
[root@local ~]# dnf install tigervnc
設定ファイル「vncserver@.service」に書かれていた書式を参考にして。
[fedora@local ~]$ ssh -v -C -L 50000:localhost:5901 xxx.xxx.xxx.xxx -l sshuser
50000:任意のローカルホストポート
5901:リモートホストポート
xxx.xxx.xxx.xxx:リモートホスト IP アドレス
接続したらVNCサーバを起動。
[sshuser@remote ~]$ vncserver :1
上記 SSH 接続を維持したまま、VNC Viewer で接続するので、新たな端末(ターミナル)の画面を出します。
端末(ターミナル)の「ファイル(F)」-「端末を開く(T)」または「新しいタブを開く(B)」。
そして、VNC Viewer を起動。
[fedora@local ~]$ vncviewer
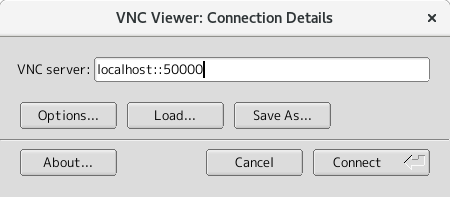
VNC server 欄に「localhost::50000」と入力。
上記 SSH 接続をした際に決めた任意のローカルホストポートを指定します。(localhost と 50000 の間のコロンは二つです)
そして、「Connect」。
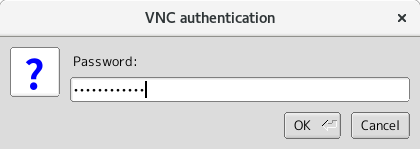
Password 欄に vncpasswd で設定したVNC用パスワードを入力。
そして、「OK」。
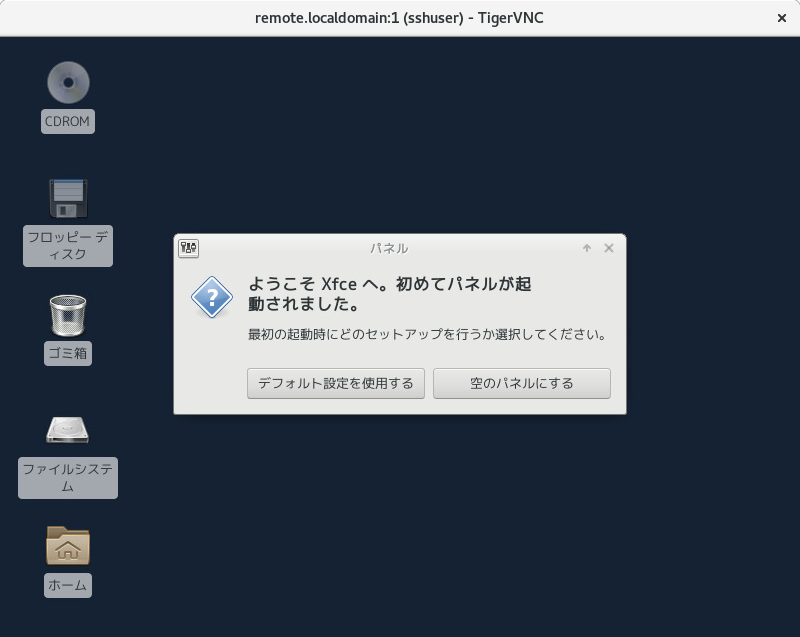
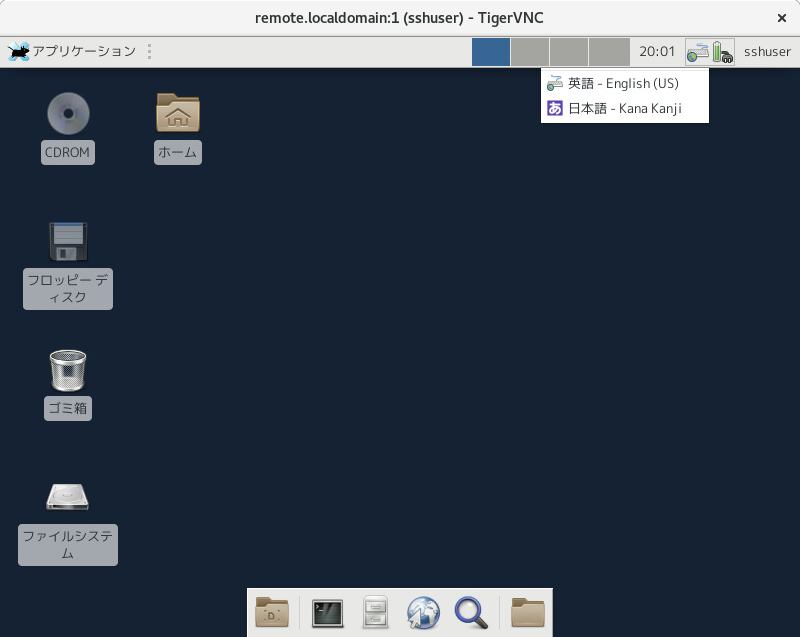
「デフォルト設定を使用する」で↓
「アプリケーション」-「設定」-「キーボード」で確認。
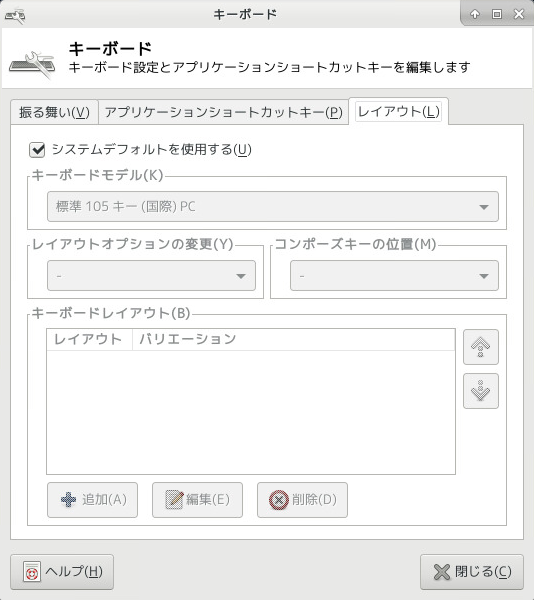
システムデフォルトのキーボードレイアウトは、以下のように設定してあります。
[sshuser@remote ~]$ localectl
System Locale: LANG=ja_JP.utf8
VC Keymap: jp106
X11 Layout: jp
X11 Model: jp106
X11 Options: terminate:ctrl_alt_bksp
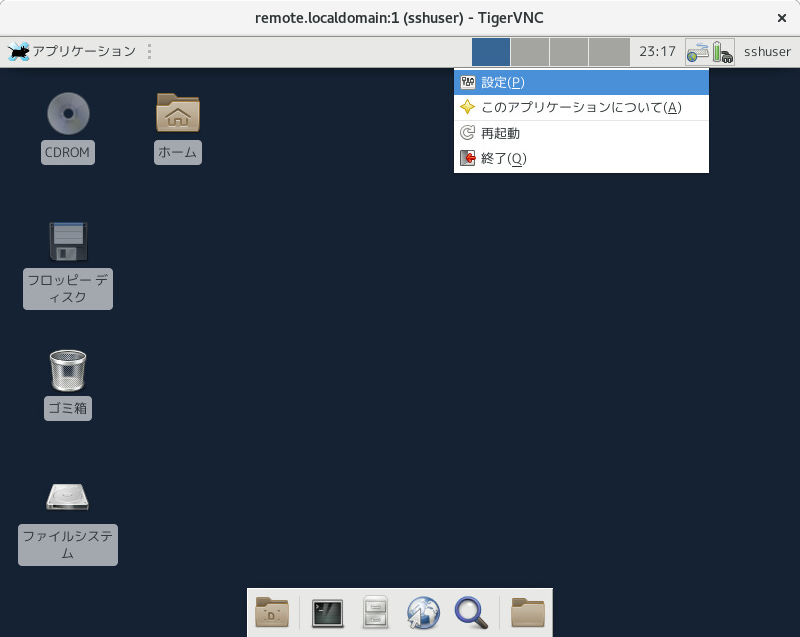
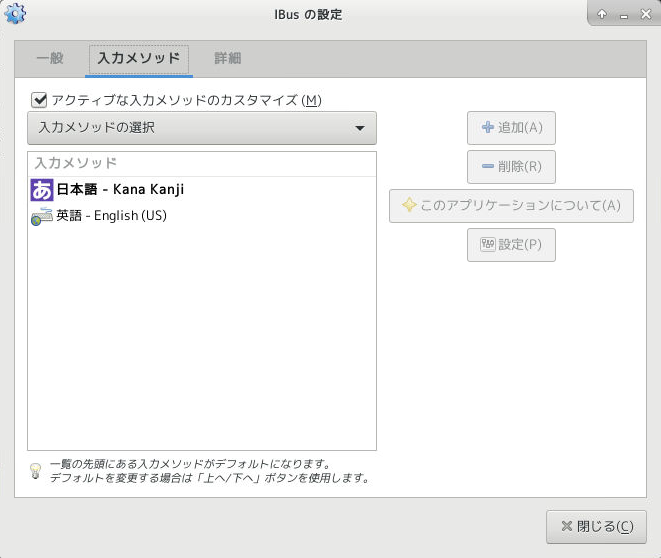
「IBus の設定」画面は、「キーボード」のアイコンを右クリック「設定」で。
「アクティブな入力メソッドのカスタマイズ(M)」にチェックを入れる。
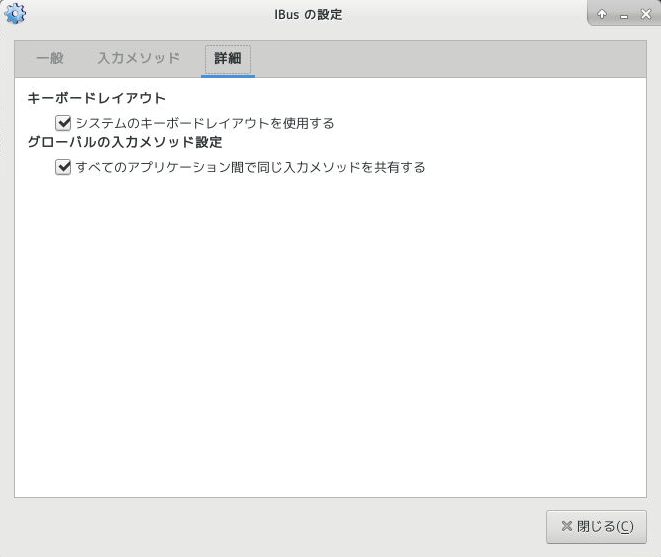
「システムのキーボードレイアウトを使用する」にチェックを入れる。
【その他】
1)原因は分かりませんが、初回のログアウトに失敗をし、次から Xfce4 のパネルが表示されないという状態になりました。
ググったところ、~/.cache/sessions ディレクトリを削除すれば直るということだったので、実行しています。
[sshuser@remote ~]$ rm -rf ~/.cache/sessions
2)終了の際は、まず VNC Viewer ウインドウ上でログアウトしてからウインドウを閉じる。
いきなり、ウインドウを閉じると、次回「su -」コマンドで root になった時に「ABRT has detected 1 problem(s).」のエラーが表示されます。
3)VNCサーバは、使用のたび起動,停止をしています。自動起動の設定もしていません。
[sshuser@remote ~]$ vncserver :1
[sshuser@remote ~]$ vncserver -kill :1
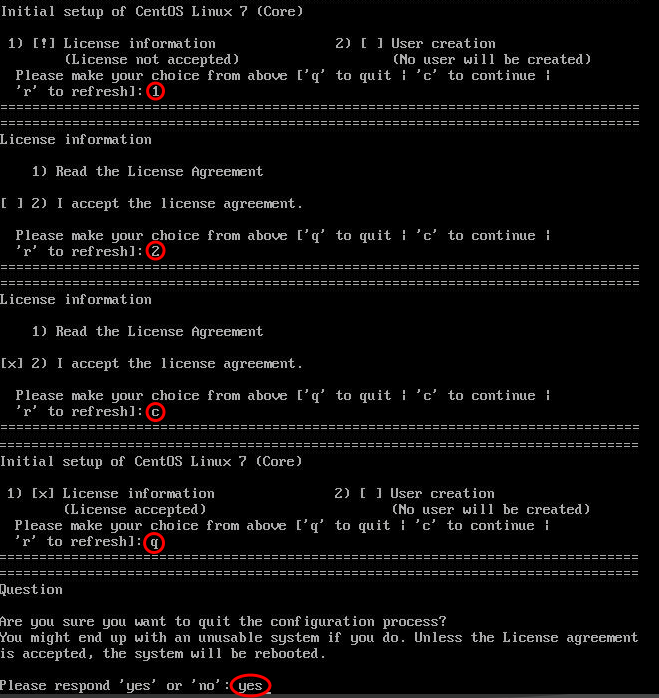
デスクトップ環境のインストール後、コンパネのコンソールで接続をすると、最初にライセンス契約の同意を求められます。
赤丸を付けたものが入力したものです。僕はビックリマークの付いた 1)License information しか行っていません。
- guitar site WAVE -